
Data Synchronization
General concept #
Global localization requires the fusion of data from two sources: the ZED Camera and an external GNSS. To ensure a successful fusion, a precise timing alignment between the data from the ZED Camera and the GNSS is crucial. This process is known as data synchronization.
There are primarily two methods for synchronizing different sensors. The first method is hardware synchronization, where all sensors are triggered by an external signal that starts all sensors’s measurements. Unfortunately, not all sensors support this type of mechanism. This is why our product implements an alternative method based on timestamps. This method also works for hardware-synchronized sensors. The key requirement for this method is that the data acquired in close proximity should have similar timestamps.
💡 Remote data acquisition If you are acquiring data from a remote computer, please ensure that your computer has a well-synchronized clock. On Ubuntu, you can consider using tools like Chrony or PTP to achieve this synchronization. Without proper time synchronization, data acquired at the same moment may end up having different timestamps, which will prevent effective data synchronization.
How it works #
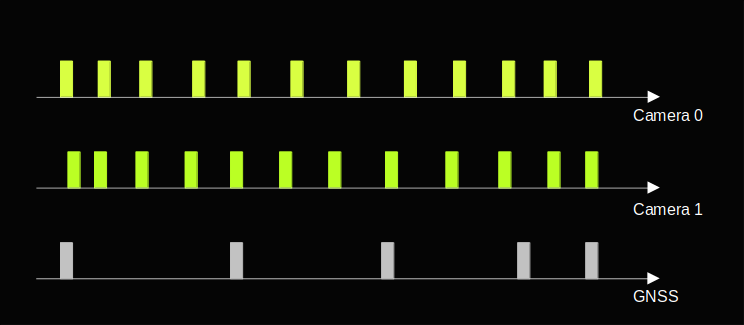
To understand how data synchronization works, let’s consider a toy example with two ZED cameras and an external GNSS. In the following example, each data is represented by a color bar aligned on its timestamp.
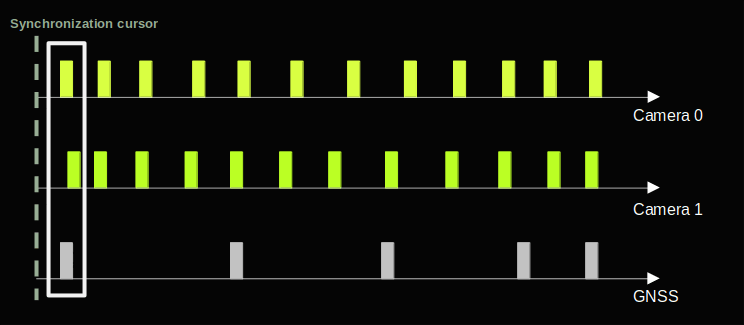
The first step of data synchronization involves matching data with closely related timestamps. In other words, data could be synchronized if they have a small timestamp difference. Allowed time difference between synchronized data could be viewed as a synchronization window. Small allowed timestamp differences will lead to small synchronization windows whereas big allowed timestamp differences will lead to big synchronization windows. The following schematic illustrates how the size of synchronization windows will influence the synchronization output.

The synchronization window size is chosen once and remains fixed for the rest of the data synchronization. Data are considered synchronized when they fall in the same synchronization window. Once the data are synchronized, they are removed from the synchronization pipeline and returned to fusion. The synchronization cursor is then advanced to synchronize the next set of data.
In the current version, the synchronization window size is determined by the camera’s declared FPS. For instance, if the camera is set at 30 FPS, the synchronization window size will be 33 milliseconds. Similarly, if the camera is set at 60 FPS, the synchronization window size will be 16 milliseconds, and so on. You can adjust the camera’s desired FPS using the camera_fps attribute within the InitParameters.
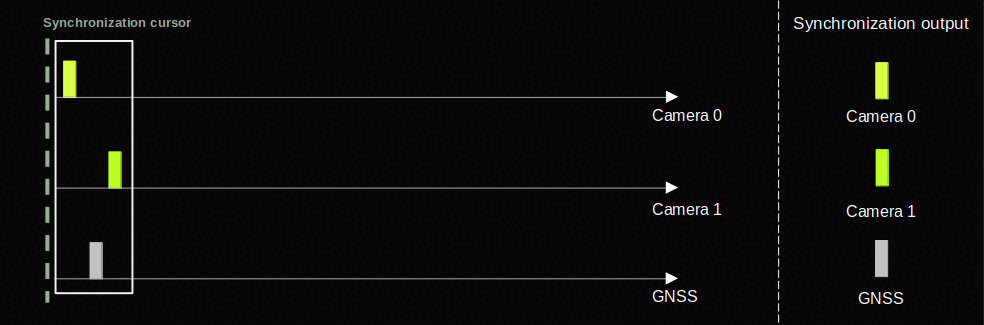
The diagram below illustrates the synchronization process once the window size has been correctly set.
Data drop issue #
The aforementioned example operates under the assumption that ZED camera data is reliably accessible at every synchronization trigger. Yet, in networked operational setups, network-related problems can arise, resulting in data drops. To mitigate this challenge, a timeout mechanism has been implemented for the camera’s data source. This mechanism allows the exclusion of a camera source if no data is received within a defined timeframe in milliseconds. Subsequently, data from the timed-out source will be re-included once it becomes accessible again. The following diagram elucidates this concept:
In the present version, the synchronization timeout can be customized using the timeout_period_number attribute within the InitFusionParameters class.